

Ah. Time to write a blog post. I almost forgot how it feels to get to the keyboard and write something that is done purely because I like to do it. I will write a bit about the progress on the laser cutter and the current status.
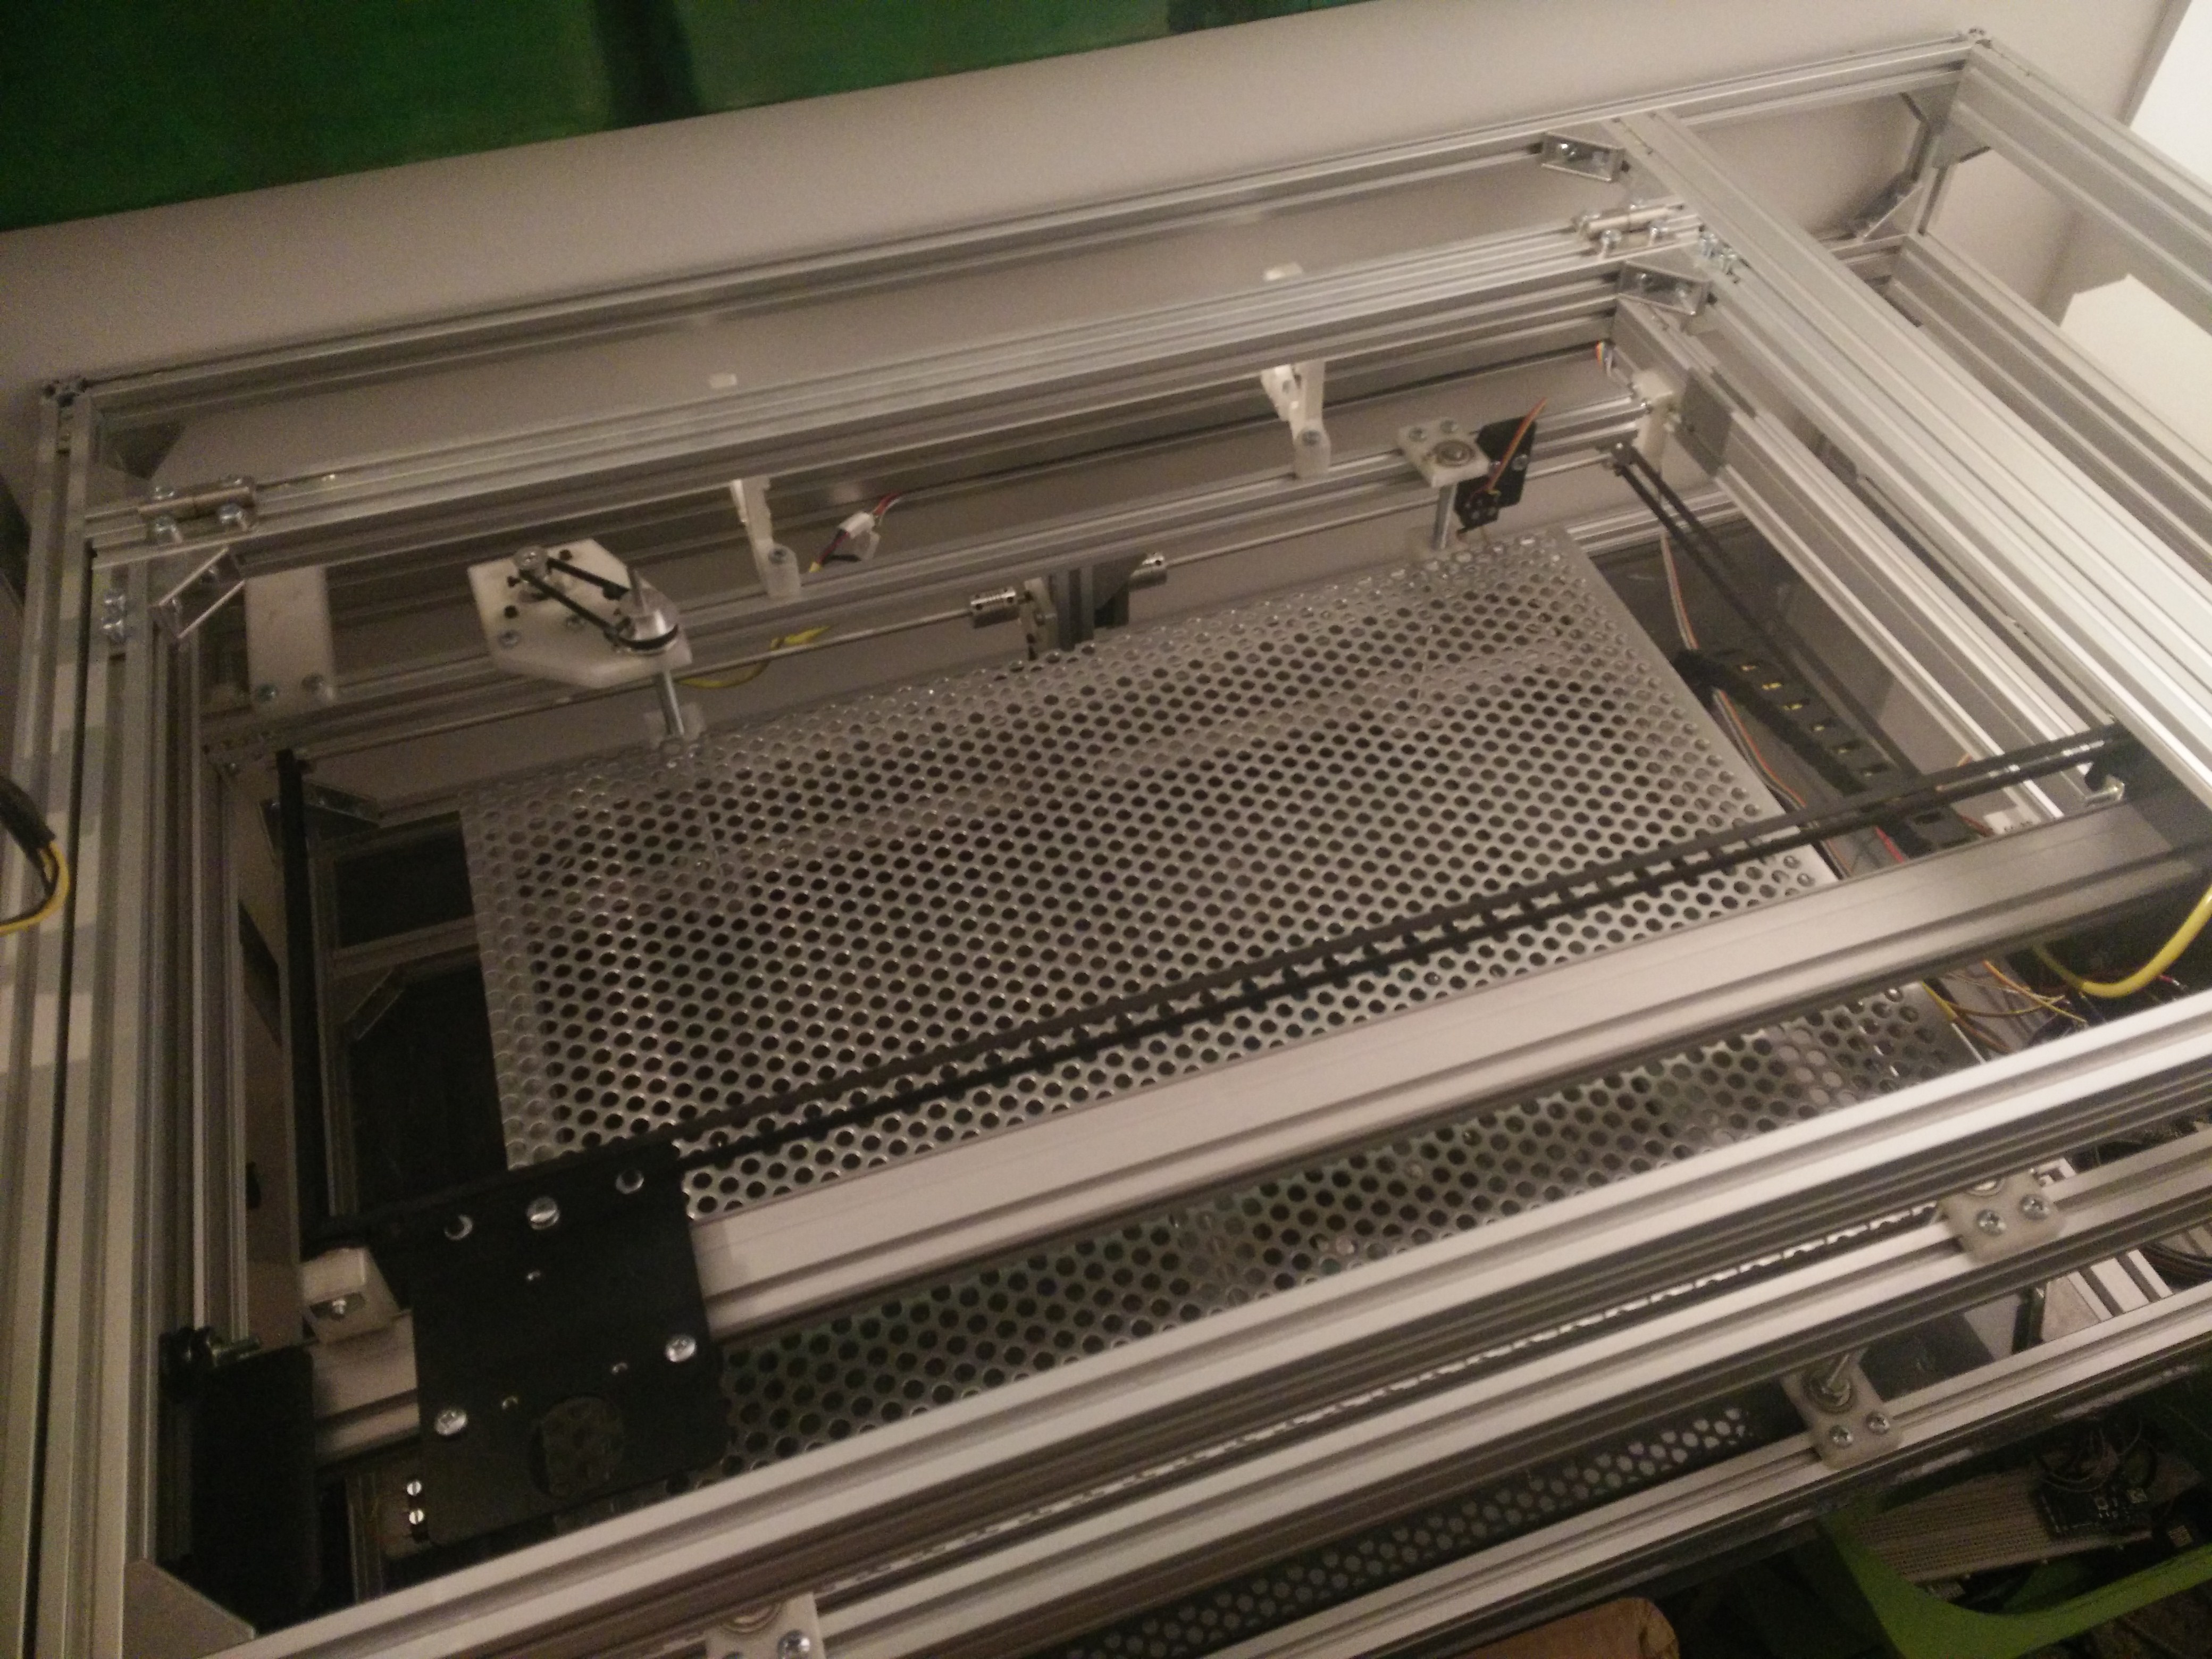
First – the mechanics. Last time I wrote the mechanical parts were almost finished. I finally gave in and ordered the right gantry parts. It was around 75$ for three pieces with a black powder coat. The installation went smooth as it usually does when you have the right materials.
I also got a scrap piece of plate that I use for cutting surface. I know I should get a honeycomb table but those are expensive. I will probably get one later on when the plate is insufficient.
 Look at it. Just look at it.. pretty slick, right?
I can’t remember if I wrote about cable carriers but if you look closely the gantry has all the cables connected through a carrier that goes straigh down to the controlboard. There should also be a carrier to the lens carriage but I haven’t mounted it (yet) because no cables are there and also because the wasn’t enough room under the lid. Air-assist should be there though and I might have to figure out how the carrier should connect to the gantry.
Next up: Electronics. This was where I have had my main hiccup since the last time. I have spent quite some time trying to figure out what to do. First thing I did was to save for a Smoothieboard.
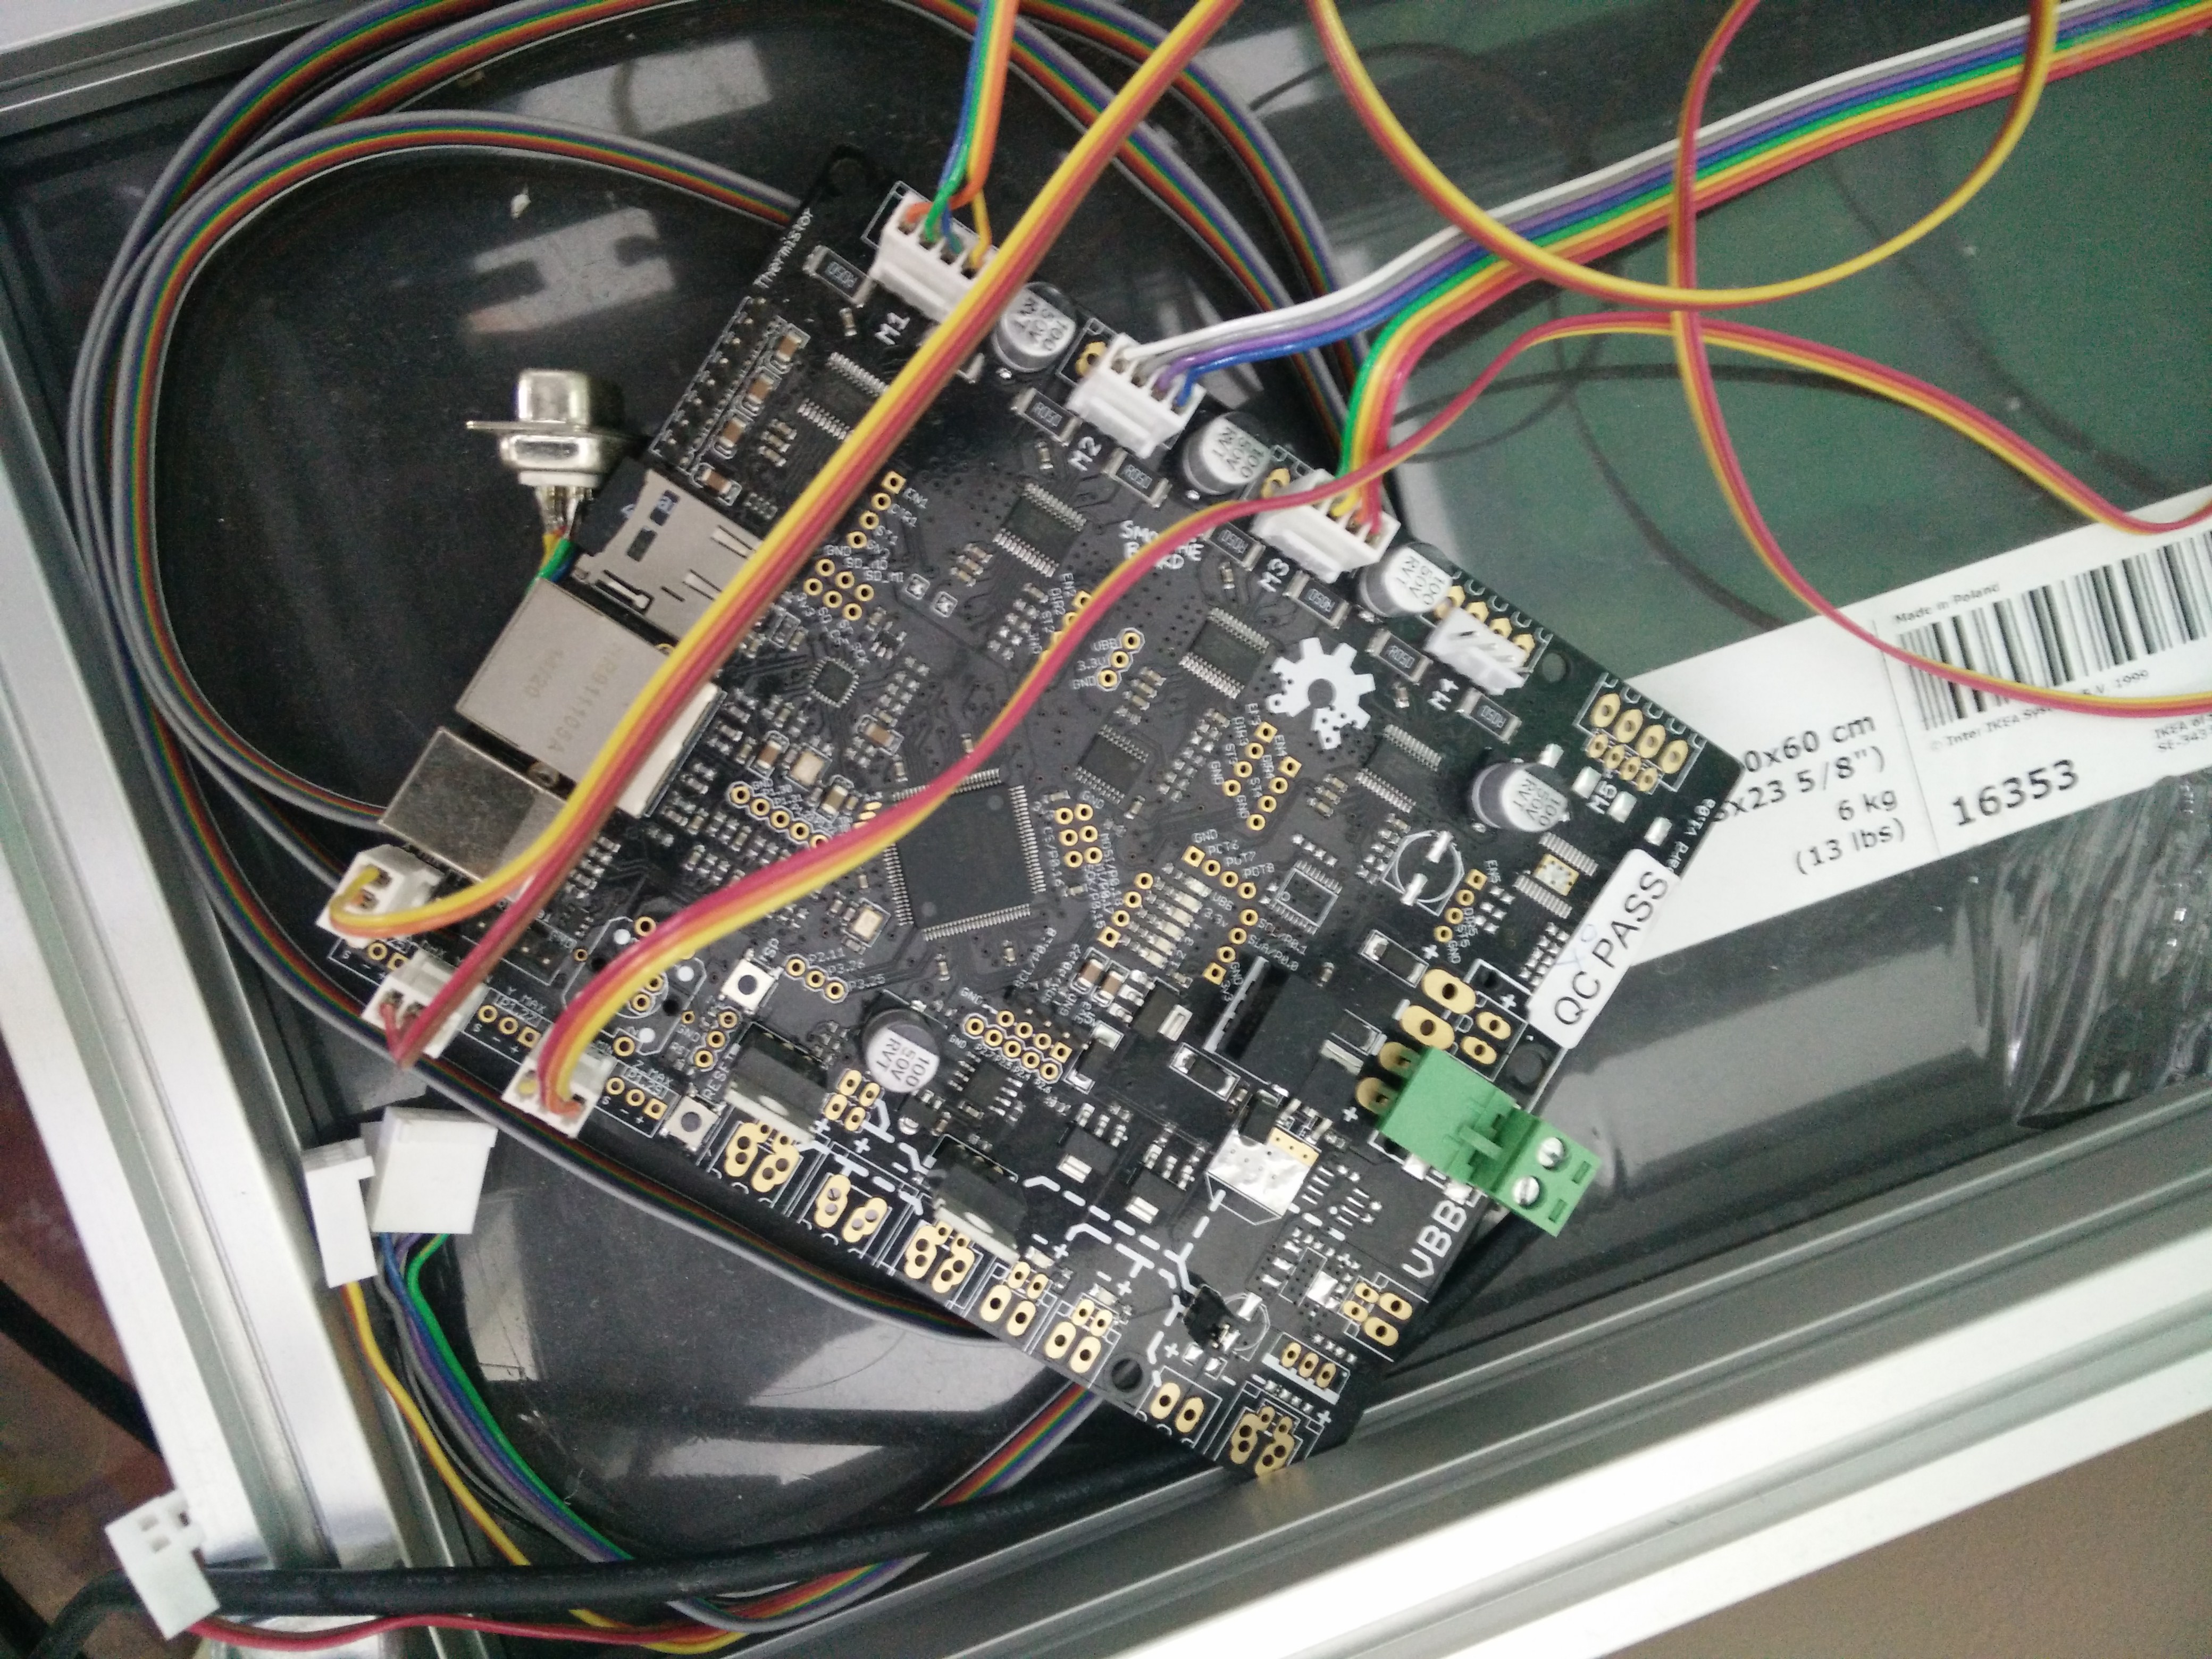
There you have it. Smoothieboard with some wires. Endstop, motors and stuff. well, just endstops and motors really. But I didn’t like it. Not at all. It’s not the Smoothieboard, I think the design is great. It has a lot of options and I really like the idea of electronic current control!
Why didn’t it work then? Well, In my oppinion (biased an whatnot) Smoothieboard has a limited support for laser cutters. Yes I know that the hardware is there and they SAY that a Smoothieboard will be able to run a laser cutter. But I can’t find anyone who have done it. I can’t find any guide that will show me how to setup the toolchain.
The problem is that the workflow from a drawing to a finished cut is not available. I know I should just do it myself but I’m looking for a slightly running system or at least an easy solution.
So what to do?
I opted for the LAOS (LAser Open Source) project. They have been building a laser controller complete with a remote control and display. The really nice thing about the LAOS project is that the VisiCut program supports the hardware. Visicut is a tool that can send designfiles to the lasercutter (LAOS board) in the right format. perfect! how do I get one of those boards?
but no! Shipping was expensive and the board was designed long time ago with some other parameters in mind. For converting cheap chinese laser cutters to an open system. This meant that the board was having some useless (at least they were useless to me) connectors. What do we do then?
I design my own version!
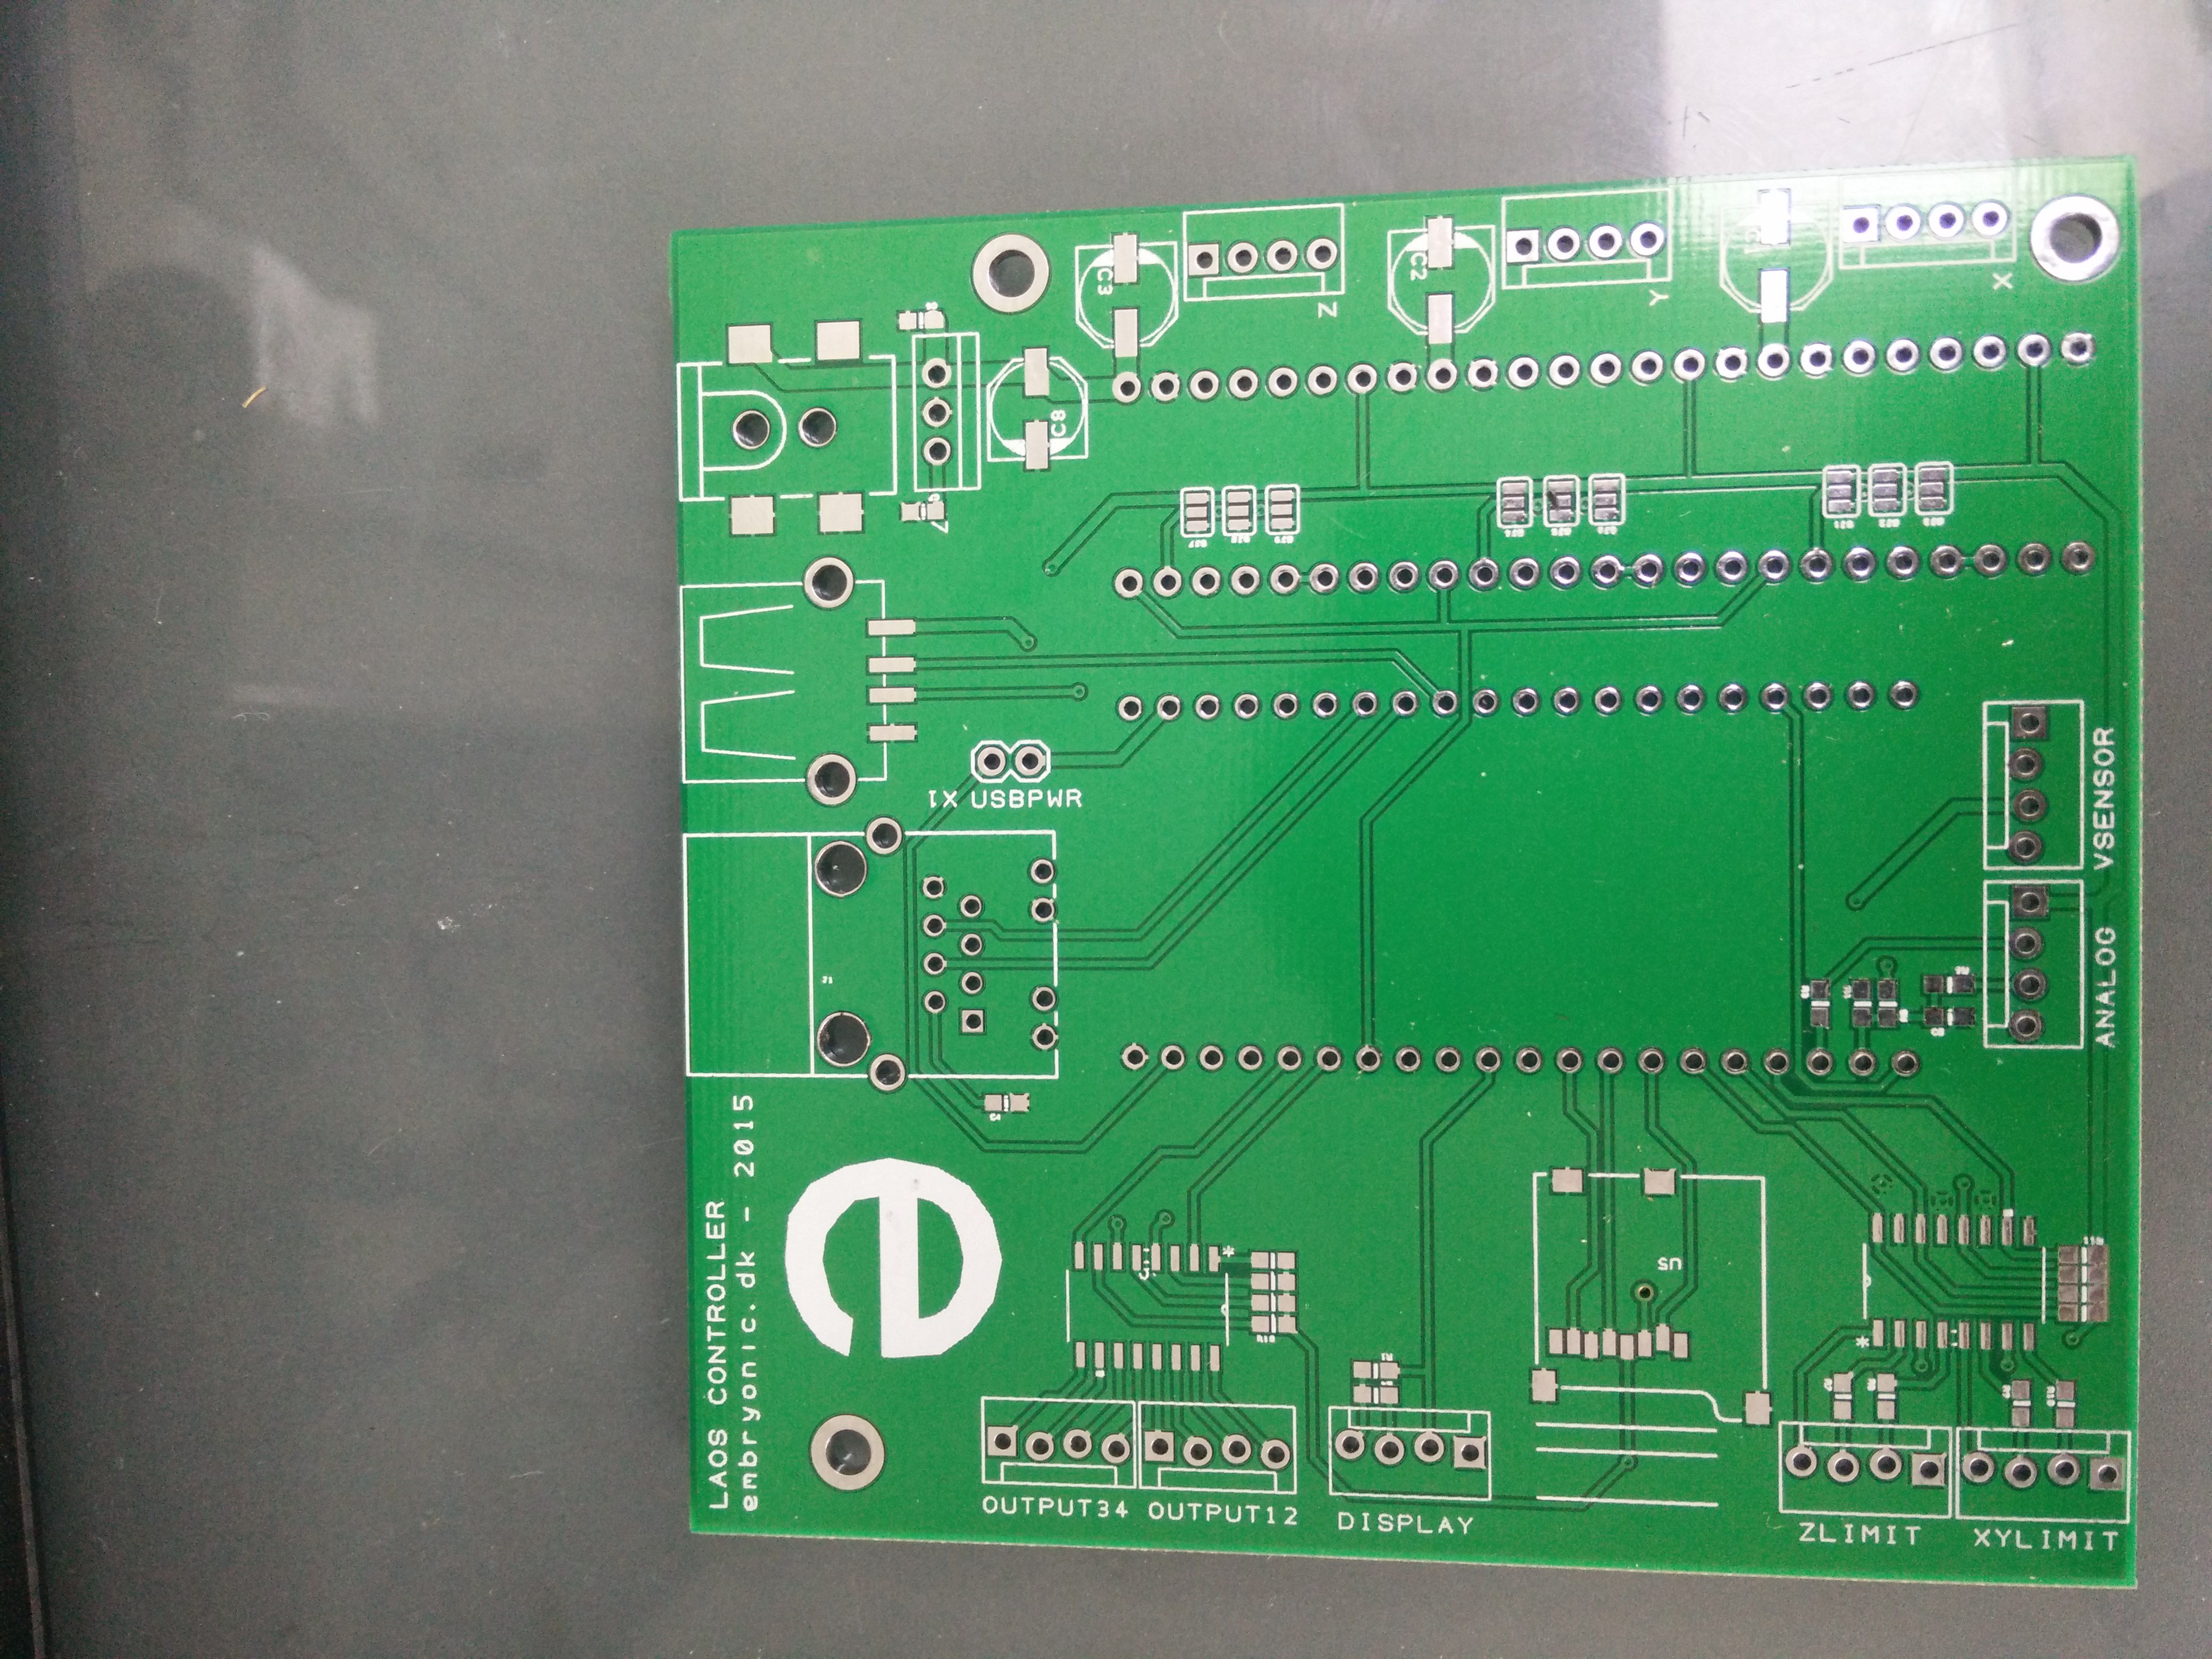 That’s right! My own version of the LAOS controller board. Yay! Off to seeedstudio and their PCB service. Being a clone of the original (Rev. 5) board I was really hoping this would get me going.
While we’re waiting for the board to arrive, let me tell you what i’ve changed:
- Removed connectors not needed for my cutter (ribbon cables, CAN bus etc.)
- changed all passives to SMD version. I really don’t like through-hole components and why should I use them when I’m having a plated board?
- Changed opto-couplers. I read on the LAOS forum that the optocouplers were a bit on the slow side so I changed to a newer IC. I hope that the speed increased with this!
- Unified plugs to the same type of locking molex connectors that I happen to have in my drawer
- Put only a micro SD socket on the board.
The changes are not that big. I mean, they really aren’t. perhaps the biggest change I did was to redo the whole board in DesignSpark instead of KiCad.
Well, would you look at that! Now the PCBs arrived! Let’s mount them! try subsystems out! Wait, it works?! well, except that I somehow mirrored the MagJack connector footprint! DANG! apart from that, the LAOS firmware can read endstops and control the motors. I can communicate with the external display and save files on the uSD card. Supply is done from a 12V brick and through an 7805 regulator. Wohoo! I got this going!
Networking is right now done through a wiresoldered direct RJ-45 connector. Not ideal, but it works.
I have installed VisiCut and sent data through the system and made the cutter move. I mounted a pen on the lens carriage and drew this!
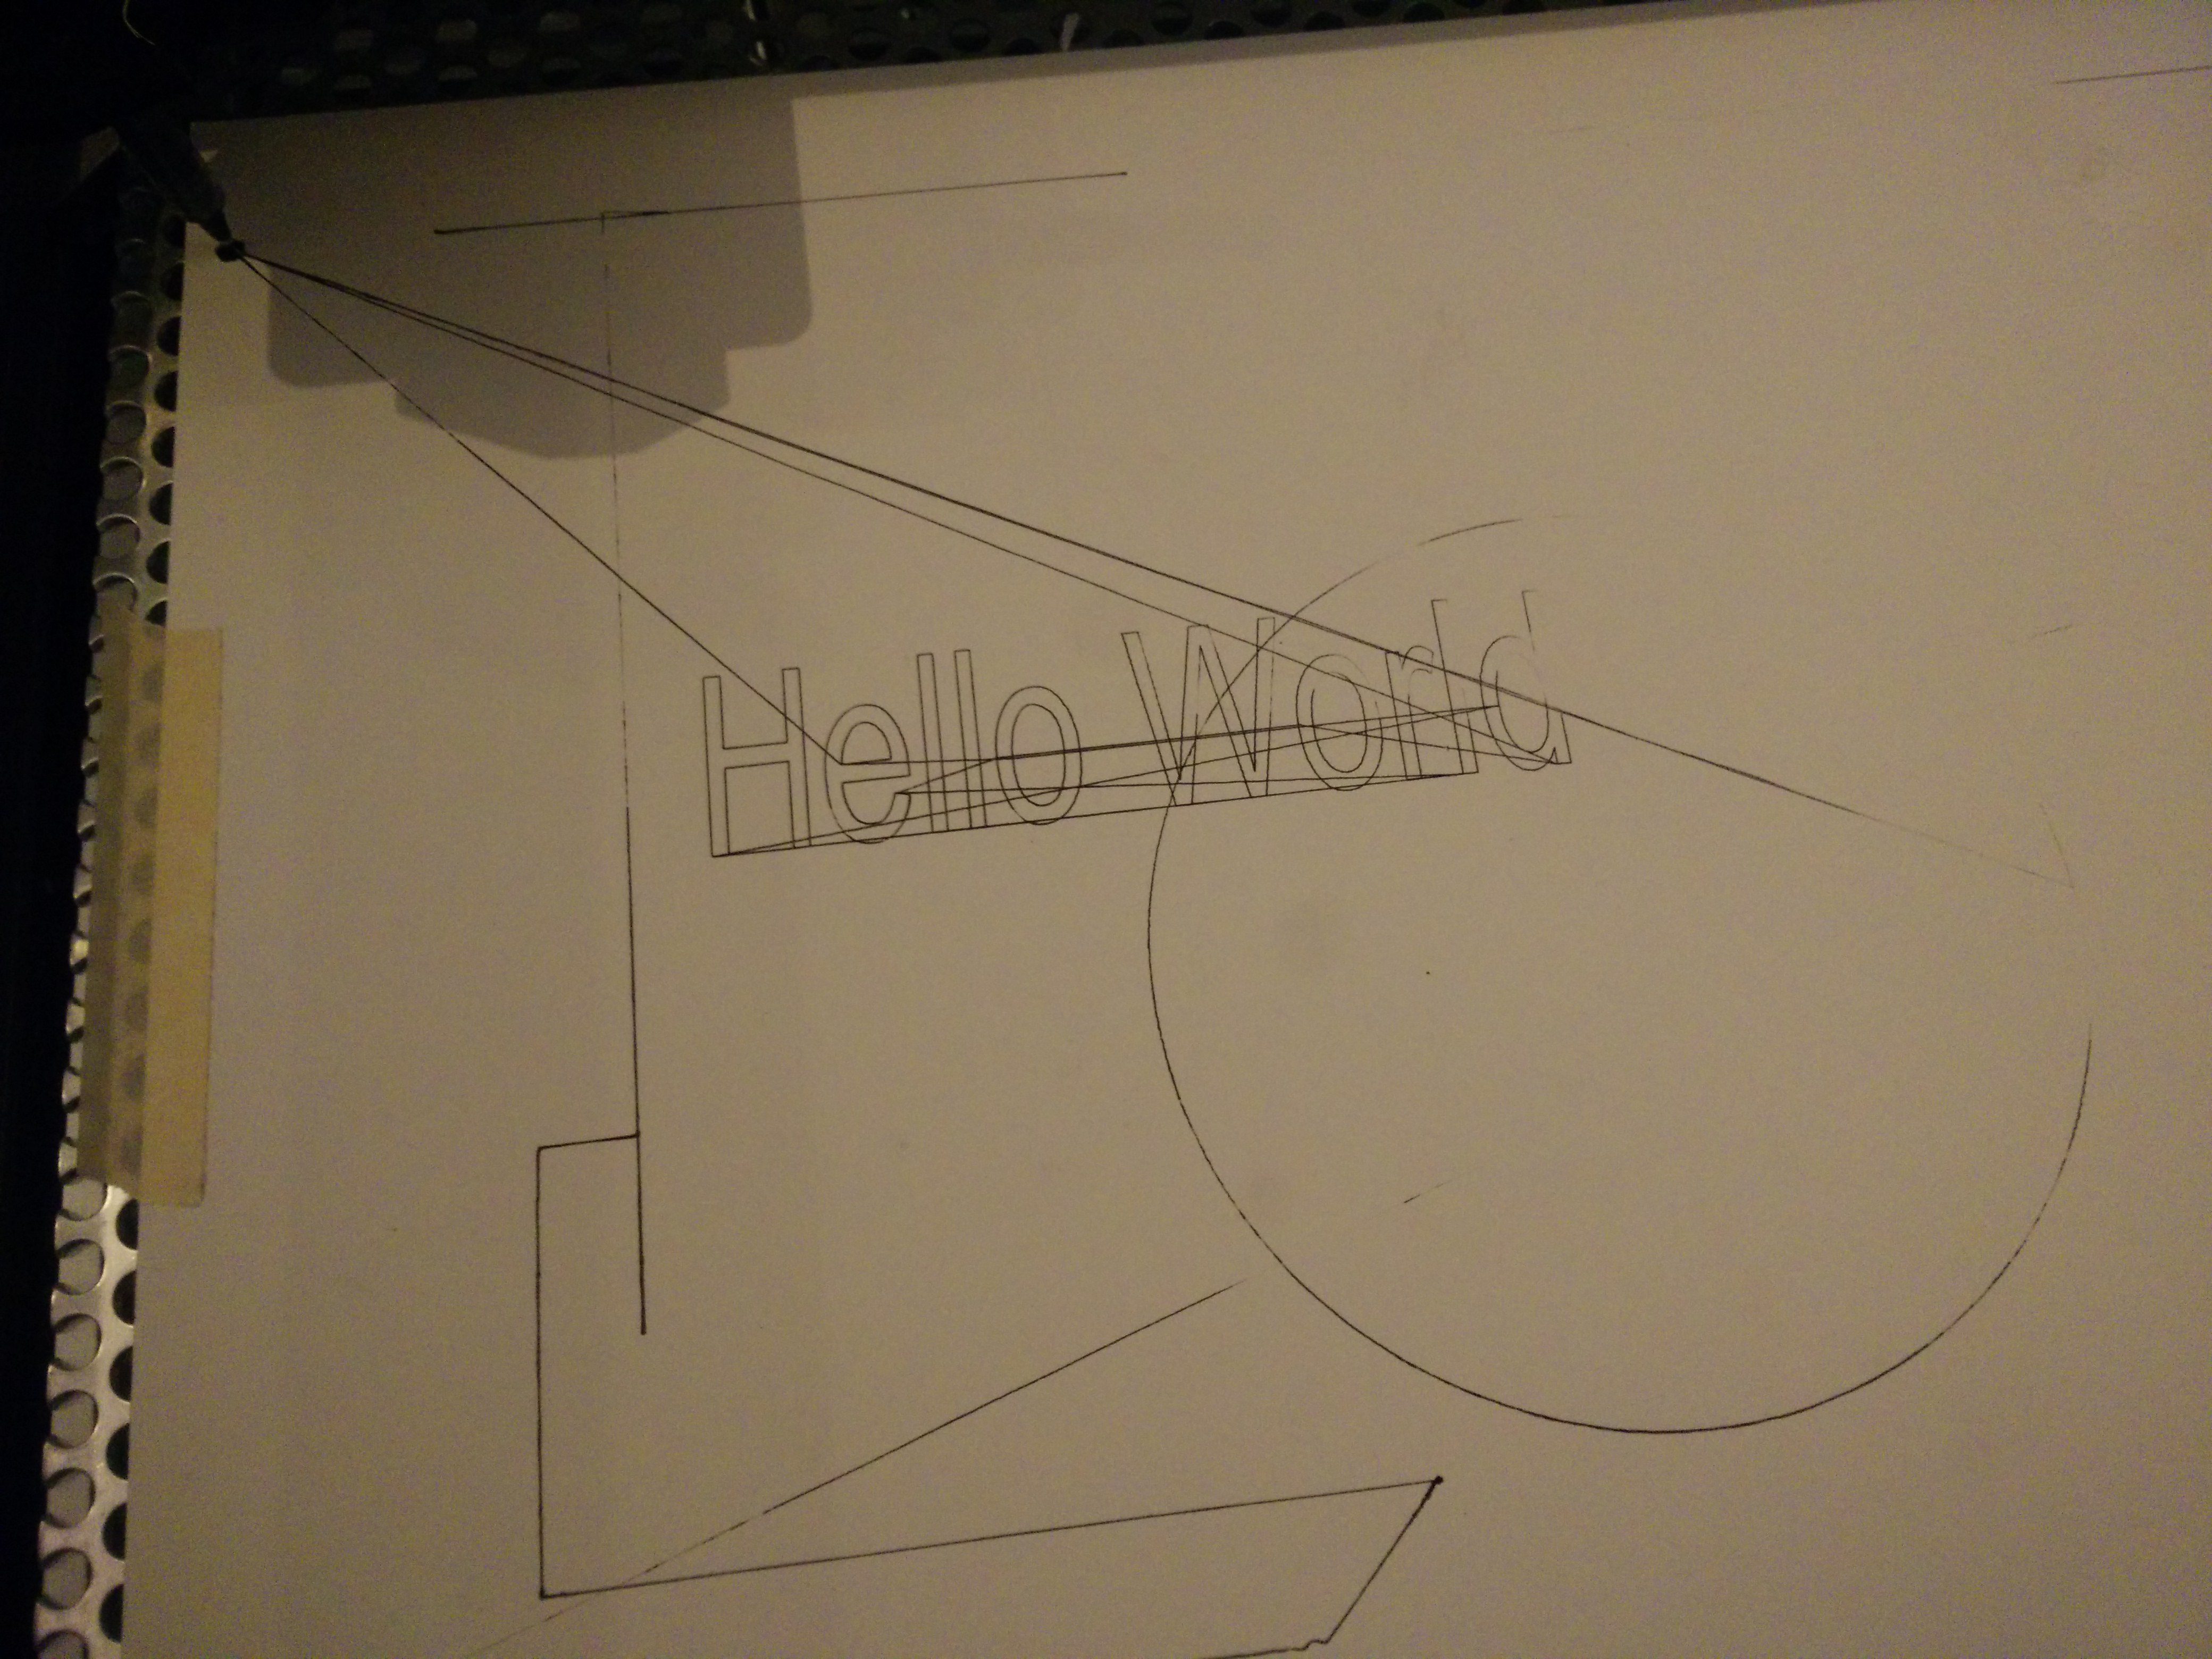 Behold, the cutter/drawing machine is now running! I’ve adjusted the cutting table so it’s level (duh!) and the list of remaining things to do is now down to:
- getting mirrors and mounts
- getting a laser tube
- getting a laser power supply
- getting the side shielding done
- getting water cooling for the laser tube
- nicify the cables and mount the parts inside the frame.
Until next time!
Just found your build log and really looking forward to seeing you complete this. I just bought all the frame and parts and hardware for this same machine. I was also thinking of going with the Smoothieboard for the controller.
Interesting! Have you made any thoughts on the toolchain with the smoothie? Their manual page is still very much unfinished…
I’ve just switched my laser over to a Smoothieboard and have been working on some improvements to it for laser cutting. Not much yet – just fiddling with adding a TTL output and handling gcode for power control a little better. Hoping to add PPI (pulsed cutting) soon.